Cooking Hussy

Tasty

Roasted Salmon March 5, 2010

Filed under: Main Dish — cookinghussy @ 12:11 pm

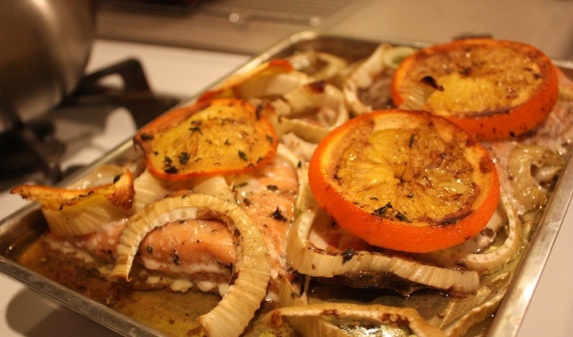
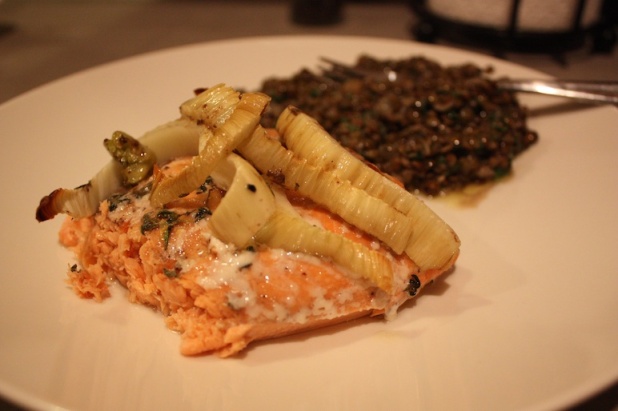
I had a mishmash of things in the fridge and cupboard and managed to piece together a very pretty, healthy (though lacking on vegetables) and delicious dinner. Some frozen salmon from the freezer, an almost to old to use bulb of fennel from the fridge, a marinade of staples and a quick roast brought this salmon together. I often find myself wanting to use the same soy sauce based marinade for fish, but I enjoy when I find something new. Served with a side of curried french lentils and I was full for hours.

  • 2 pieces of salmon
  • 2 T. balsamic vinegar
  • 1 T. thyme
  • juice from 1/2 an orange
  • 1 clove garlic, minced
  • 2-3 T. olive oil
  • salt/pepper
  • several slices of oranges
  • 1 bulb fennel, sliced

Heat the oven (or toaster oven, which is what I used) to 425 degrees. Mix together the marinade and place fish in the dish. I let this sit for about 1/2 hour before placing on a pan, topping with the fennel and oranges and pouring the rest of the marinade over the fish. Roast for about 15 minutes (shorter if the fish isn’t as thick), check to make sure it’s done and serve immediately.

Notes: The original recipe online called for lemons, but I didn’t have any. I also didn’t have balsamic vinegar so I used my cream of balsamic. It all worked out in the end!

Servings: This made 3 servings


Smoked Turkey Rueben March 2, 2010

Filed under: Main Dish — cookinghussy @ 9:00 pm

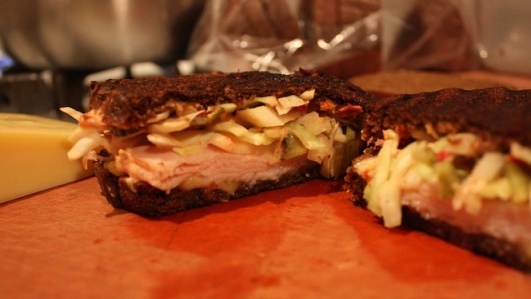
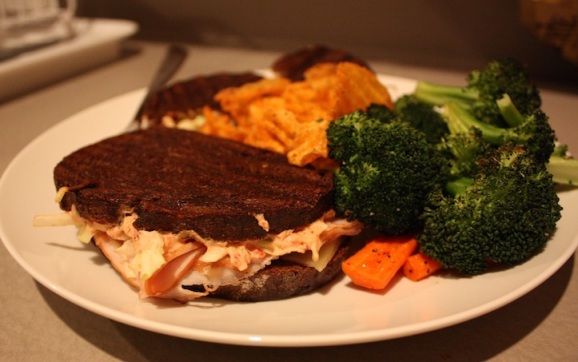
Oh baby! I’m finally getting my appetite back now that I’m in my second trimester. My interest in cooking, let alone something new and untried, dropped dramatically during my first trimester. I stuck to things that I hoped my body would tolerate, safe food! But finally, I’m back in the kitchen, trying new things and throwing together recipes. This one was from The Kitchen Sink and I made it work even for my pregnancy restrictions (just heated the deli meat up first before putting it on my sandwich to grill).

  • 2 cups thinly sliced green cabbage (about 4 oz.)
  • 3/4 cup finely diced kosher dill pickle (from 1 large)
  • 2 tsp. cider vinegar
  • Kosher salt
  • 1/2 cup plain yogurt (full or low-fat)
  • 3 oil-packed sun-dried tomatoes
  • 2 Tbs. canned or jarred tomato sauce (pure, pureed tomatoes)
  • 8 slices whole wheat bread (I used rye bread)
  • 12 thin slices smoked turkey
  • 8 thin slices Swiss cheese
  • 2 Tbs. unsalted butter, softened

In a medium bowl, toss the cabbage and pickles with the vinegar and 1/2 tsp. salt. Transfer to a colander, set it in the sink, and let sit for 10 minutes. Meanwhile, pulse the yogurt, sun-dried tomatoes, and tomato sauce in a food processor until the tomatoes are finely chopped. (I just diced everything up and mixed together since I didn’t want to dirty the food processor.)

Squeeze the cabbage mixture to remove any excess liquid and return to the bowl. Toss the cabbage with 2 Tbs. of the yogurt mixture.

Spread the remaining yogurt mixture on one side of each slice of the bread. Assemble the sandwiches, layering the turkey, cabbage, and cheese over 4 slices of the bread and topping with the other 4 slices. Spread the outsides of the sandwiches with the butter.

Heat a large grill pan, skillet, or stovetop griddle over medium-low heat. Working in batches if necessary, put the sandwiches in the pan, top with a grill press or heavy skillet to weigh them down, and cook until browned, 2 to 4 minutes. Flip and cook the other side until browned and the cheese is melted, 2 to 4 minutes more. Cut the sandwiches in half and serve.

Notes: A lovely and lighter version of the classic Rueben, which Chris and I both love.

Servings: As many as you want!


Braised Short Ribs February 2, 2010

Filed under: Misc. — cookinghussy @ 10:16 pm

This was one of those recipes that I just wouldn’t shut up about. We’d go to a party, I’d have a few drinks and BAM, I’d be telling someone about how I was going to have them over for some braised short ribs because I found this recipe that looks amazing! Smitten Kitchen of course.
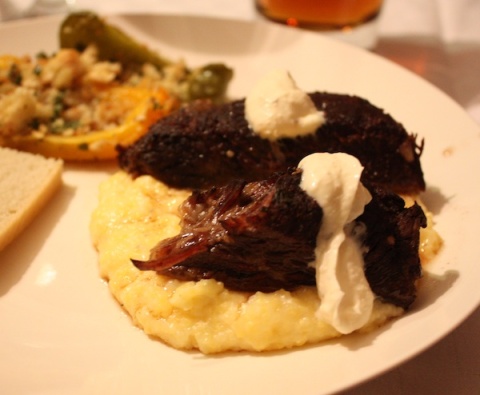
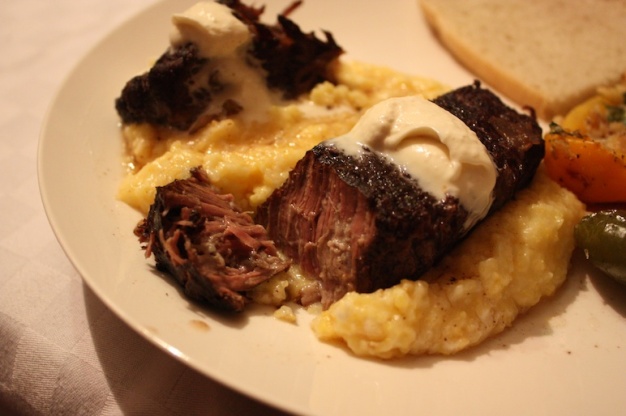
By the time I finally got around to actually making this dinner, I’d created an 8 person dinner party. Luckily my friends are awesome and they all pitched in with drinks, appetizers, vegetables and dessert, leaving this fall apart beautiful meat and creamy polenta for me to make. I sent Chris to Gene’s Sausage Shop to pick up a whopping 12 short rips at around 14-16 ounces a piece. Apparently the people at the counter couldn’t stop telling Chris how beautiful the meat was and how much he was going to enjoy it. It was true.
12 beef short ribs, about 14 to 16 ounces each (ask for 3 bone center-cut)
2 tablespoon plus 1 teaspoon thyme leaves, and 4 whole sprigs thyme
2 tablespoon freshly cracked black pepper
1/2 cup extra-virgin olive oil
1 cup diced onion
2/3 cup diced carrot
2/3 cup diced celery
4 bay leaves
4 tablespoons balsamic vinegar
2 1/2 cups port
4  cups hearty red wine
8 cups beef or veal stock
8 sprigs flat-leaf parsley
Kosher salt and freshly ground black pepper

Season the short ribs with 1 tablespoon thyme and the cracked black pepper. use your hands to coat the meat well. Cover, and refrigerate overnight. (I didn’t do this but it still turned out fine.)

Take the short ribs out of the refrigerator an hour before cooking, to come to room temperature. After 30 minutes, season them generously on all sides with salt.

When you take the ribs out of the refrigerator, preheat the oven to 325 degrees F.

When it’s time to cook the short ribs, heat a large Dutch oven over high heat for 3 minutes. Pour in 3 tablespoons olive oil (I had to use two pans, so 3 T. in each), and wait a minute or two, until the pan is very hot and almost smoking. Place the short ribs in the pan, and sear until they are nicely browned on all three meaty sides. Depending on the size of your pan, you might have to sear the meat in batches. Do not crowd the meat or get lazy or rushed at this step; it will take at least 15 minutes. [I find this takes closer to 45 minutes if you’re really thorough. Be thorough! sk] When the ribs are nicely browned, transfer them to a plate to rest.

Turn the heat down to medium, and add the onion, carrot, celery, thyme springs, and bay leaves. Stir with a wooden spoon, scraping up all the crusty bits in the pan. Cook 6 to 8 minutes, until the vegetables just begin to caramelize. Add the balsamic vinegar, port, and red wine. Turn the heat up to high, and reduce the liquid by half.

Add the stock and bring to a boil. Arrange ribs in the pot, lieing flat, bones standing up, in one layer. [If you used a saute pan for previous steps, transfer the ribs to a braising pan at this point.] Scrape any vegetables that have fallen on the ribs back into the liquid. The stock mixture should almost cover the ribs. Tuck the parsley sprigs in and around the meat. Cover tightly with aluminum foil and a tight-fitting lid if you have one. Braise in the oven for about 3 hours. (I had to use a large, oven safe soup pot and the inside pot from my crockpot to fit all the meat, but it worked!)

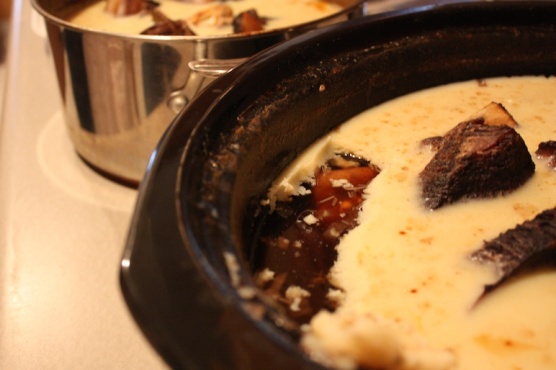
To check the meat for doneness, remove the lid and foil, being careful of the escaping steam, and piece a short rib with a paring knife. When the meat is done, it will yield easily to a knife. Taste a piece if you are not sure. [If you would like to cook these a day ahead, this is where you can pause. The next day, you can remove the fat easily from the pot — it will have solidified at the top — bring these back to a simmer on the stove or in an oven, and continue. sk] (If you look at the top picture, you will see how much FAT comes to the time. I cooked the ribs the night before and was glad when I saw all the fat at the top. Much easier to skim that way.)

Let the ribs rest 10 minutes in their juices, and then transfer them to a baking sheet.

Turn the oven up to 400 degrees F.

Place the short ribs in the oven for 10 to 15 minutes to brown.

Strain the broth into a saucepan, pressing down on the vegetables with a ladle to extract all the juices. Skim the fat from the sauce (if you made these the day before, you will have already skimmed them) and, if the broth seems thin, reduce it over medium-high heat to thicken slightly. Taste for seasoning.

Horseradish Cream

3/4 cup créme fraîche
1 tablespoon prepared horseradish
Kosher salt and freshly ground black pepper

Combine the créme fraîche and horseradish in a small bowl. Season with 1/4 teaspoon salt and pepper. Taste for balance and seasoning.

Servings: 8 generous servings and leftovers

Notes: This is just pure wintertime decadence. Your house will smell amazing and your friends will love you.
 

Cabbage Pie January 30, 2010

Filed under: Main Dish — cookinghussy @ 1:03 pm

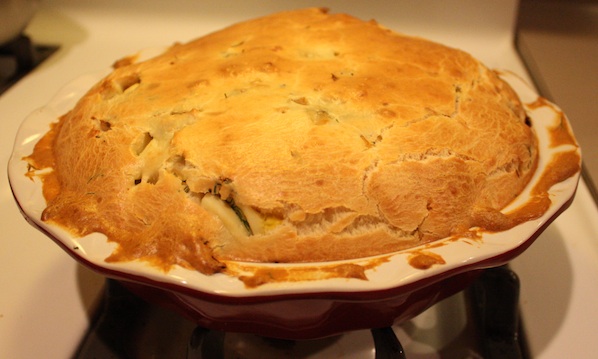
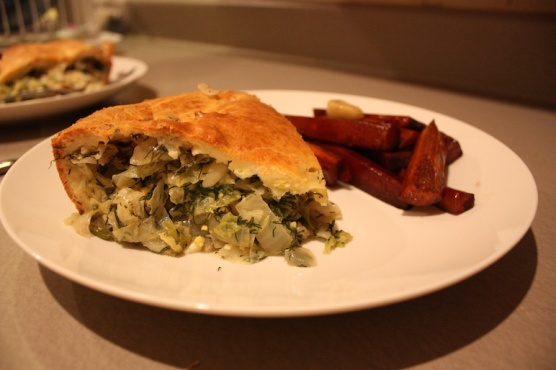
That’s right folks. Cabbage pie! I never thought this was something I would make, but when I found myself with two heads of cabbage and no desire for any stir fry (a cabbage standby for me), I pulled out Mark Bittman’s “How to Cook Everything Vegetarian” cookbook and took a look at the back to find out what I could do with cabbage.

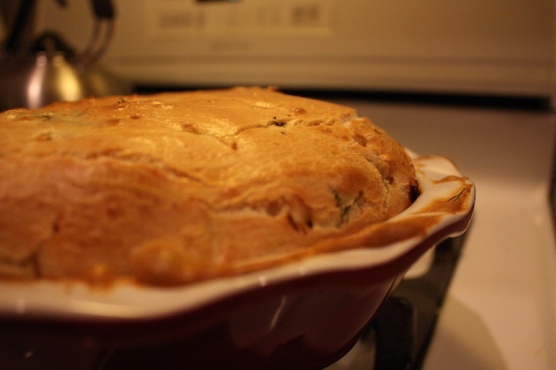
Enter: vegetable pie. Apparently there are lots of vegetable pies out there: Kale or chard pie, mushroom and kasha pie and many more. In the process, I was really doubtful of how the crust would work. It comes together as a batter which you kind of smear around the bottom of the pan and then just pour on top of the cabbage. But it worked! Like magic!

  • 2 T. butter
  • 1 medium head of savoy or white cabbage
  • 1 medium onion – sliced
  • salt/pepper
  • 2/3 C. chopped fresh dill
  • 6 eggs
  • 1 cup whole-milk yogurt or sour cream
  • 3 T. mayo (weird, but it made the crust work)
  • 1/2 t. baking powder
  • 1 1/4 cups all-purpose flour

1. Preaheat the oven to 375. Put the butter in a large skillet (nonstick) and heat to medium. A minute later, add the cabbage and onion. Sprinkle on salt and pepper and cook, stirring, until the leaves are quite tender, about 10 minutes. Do not brown. Remove from heat and add the dill. Taste and adjust the seasonings.

2. Meanwhile, hard-cook* 3 of the eggs, then shell and coarsely chop. Add the cooked cabbage mixture and let cool while you make the batter.

3. Combine the yogurt, mayo, and remaining eggs. Add the baking powder and flour and mix until smooth. Lightly butter a 9 x 12 inch ceramic baking dish. Spread half the batter over the bottom and up the sides. Top with the cabbage filling, smear the remaining batter over the cabbage. Make sure there are no gaps.

4. Bake for 45 minutes. It will be shiny and golden brown. Let the pie cool for at least 15 minutes before slicing.

* I learned how to hard boil eggs from 101cookbooks.com and it works perfectly. Fill your pot with cold water and put in your eggs. Make sure the water fully covers the eggs. Put on high heat and wait for the water to boil. Once fully boiling, turn the heat off and put a lid on the pan. Let the eggs cook for 7 minutes. Drain and run cold water over the eggs to stop the cooking. Lovely!

Notes: This is a hearty meal and perfect for the winter! The filling itself is a nice light flavor and could be eaten as a side.

Servings: 8 servings (one slice per serving)


Butternut Squash Soup with Blue Cheese December 17, 2009

Filed under: Soup/Stew,Vegetarian — cookinghussy @ 9:41 pm

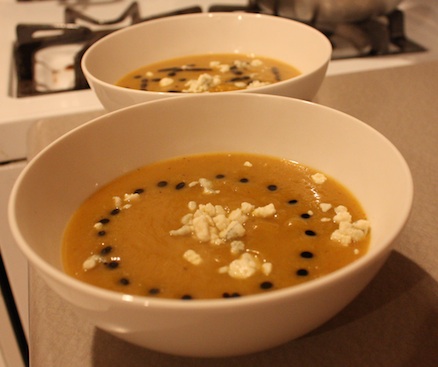
Mmmm. Today I’ll post this picture of some curried butternut squash soup that I topped with blue cheese and some balsamic glaze. It was delicious and makes for a warm and creamy soup with just a bit of kick.


Cauliflower and Quinoa with Almonds December 8, 2009

Filed under: Vegetarian — cookinghussy @ 8:12 pm

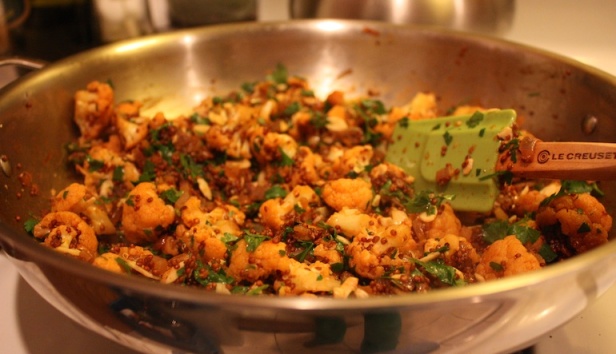
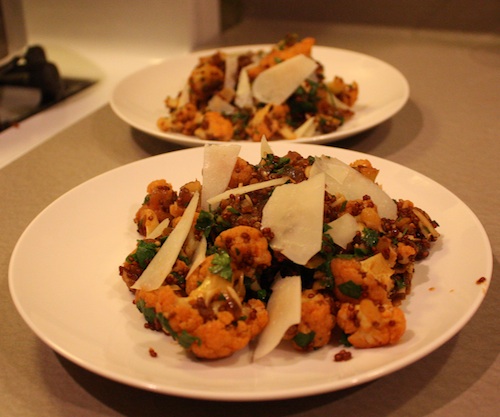
This is a really lovely vegetarian dish. I’d say it’s pretty enough and tasty enough to serve to guests as well. Cauliflower can get a very rich, beautiful flavor when seared and the mixture of spices, nuts and cheese makes this a great winter dish. I found the recipe on Serious Eats.

  • 1/2 cup sliced almonds
  • 3 tablespoons olive oil
  • 1 large shallot or small red onion, minced
  • 1 small head cauliflower, or 1/2 a normal one
  • 1 cup couscous (or quinoa, which is what I used)
  • 2 teaspoons smoked paprika
  • 1 1/2 cups vegetable stock
  • 1/2 cup chopped parsley
  • Freshly sliced or grated Manchego (or other semihard sheep’s milk cheese)
  • Salt and pepper to taste
Procedure

1. Toast the almonds in a deep skillet over medium-high heat for a couple minutes, just until toasted and fragrant. Remove the almonds from the pan, set aside. In the meantime, chop half the cauliflower and break up the other half into bite-size florets.

2. Return the pan to the heat, add the olive oil and cook the shallot until soft and beginning to color, about 2 minutes. Turn the heat to high and add the cauliflower. Season with salt and pepper. Cook the cauliflower until it begins to soften and color, 5 to 10 minutes. Stir in the couscous (or quinoa) and cook another 3-5 minutes, allowing the grains to be well coated and a bit toasted.

3. Add the smoked paprika, followed by the vegetable stock. Bring to a boil. Once boiling, turn to low heat, cover and cook undisturbed for 5 minutes. Chop the almonds and add them to the pan along with the parsley and fluff with a fork.

4. Garnish with grated or shaved Manchego and serve. Feel free to drizzle with olive oil.

Servings: 4


Homemade Lara Bar – Cherry and Almond November 25, 2009

Filed under: Appetizer — cookinghussy @ 1:10 pm

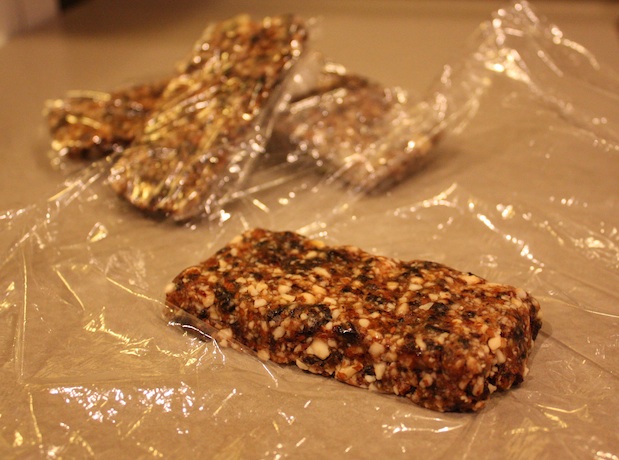
The holidays are here! Tomorrow morning Chris and I will be waking up bright and early to catch a 7:50 a.m. flight to Houston. We’ll be visiting his family in Texas for Thanksgiving.  While I hate early morning flights, I think I hate airport food even more. Unlike most people, I get to see what my blood sugar does (real time now with my Dexcom!) when I eat a scone or even worse, a fast food breakfast sandwich. Not good people, not good! So I’ll bring a little snack of my own, homemade Lara bars.  If you’ve never had a Lara bar, you are missing out. They are made with only a handful of ingredients, all real foods like dates, dried fruit, nuts and spices. So basic, in fact, that you can make your own and save about $4 a bar! I followed this recipe from Enlightened Cooking to make some Very Cherry Bars.

“LARA BARS use a multi-layer package that keeps out UV light and oxygen, which, in turn, maintains freshness without the use of preservatives. I use plain old plastic wrap and my refrigerator, then pop one in my bag when I’m ready to go.” – Cooking Hussy Note: Yep, this worked well for me too!

  • 1/2cup chopped dates (roughly chopped whole dates, not pre-chopped)
  • 1/2 cup dried cherries or dried cranberries
  • 2/3 cup whole almonds
  • 1/4 teaspoon cinnamon

Place the dates (minus seeds!) and cherries in a food processor. Pulse until processed to a paste. Transfer paste to a medium bowl (don’t clean processor). Or, if your cherries are a bit too dried, transfer to a big chopping block and chop away.

Add the nuts to the processor and pulse until finely chopped. Add the nuts, along with the cinnamon, to the bowl with the fruit paste. Use your fingers to knead the nuts into the paste (just keep squishing, it’s fun).
Divide mixture in half, then in half again (4 balls). Place each piece on a sheet of plastic wrap. Wrap the plastic around each bar and start squishing into a bar shape form, 3 and 1/2 inches long, 1 inch wide and 3/4-inch thick); press against countertop to flatten bottom side, flattening top side and ends with flat of hand. Tightly wrap the plastic around each bar and store in the refrigerator. Makes 4 bars.

Nutrition per Serving (1 bar): Calories 207; Fat 9.4 g (sat .8g, mono 5.2g, poly 3.1g); Protein 3.9g; Cholesterol 0mg; Carbohydrate 24.9g; Sodium 0.4mg. (Note: I did the nutrition analysis using Diet Analysis Plus 7.0.1)

Notes: I look forward to trying some varieties with walnuts and dried apricots as well!


Garlic Butter Roast Chicken November 22, 2009

Filed under: Main Dish — cookinghussy @ 7:00 pm

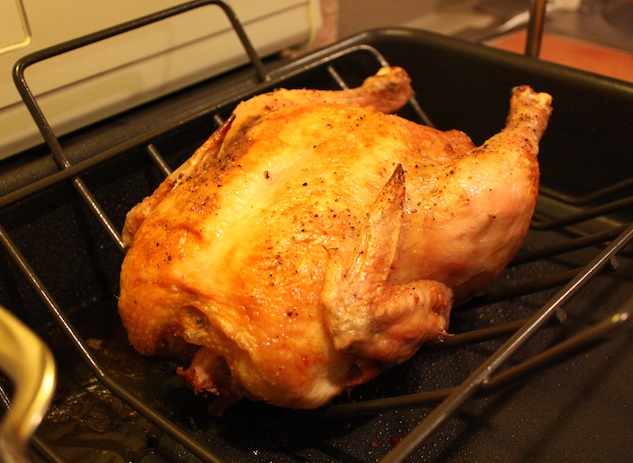
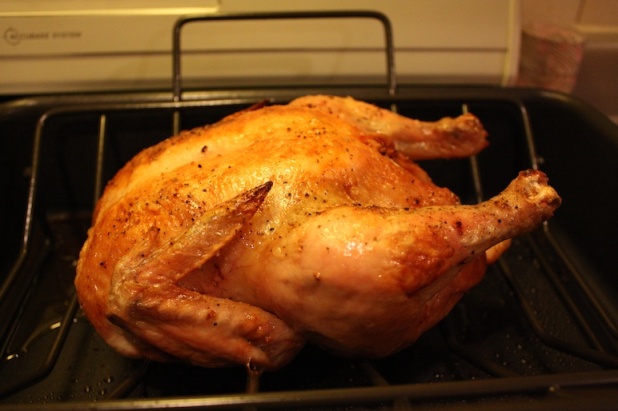
Beautiful, isn’t it? My very first roasted chicken. While working at the Chopping Block, I’d seen them stuff gobs of butter under the skin of chicken before roasting it and having it come out with crispy skin and juicy meat. I’ve wanted to try it and finally got to Whole Foods to buy a free-range, organic chicken. I’ve read too much to purchase or eat a regular grocery store chicken! Anyway, we had friends over to enjoy this with us and I’m pleased to say we all really enjoyed it.

  • 1 free range, organic roasting chicken
  • 4 cloves garlic – minced or pressed
  • 1/2 stick (yikes!) butter
  • Olive oil
  • Salt & Pepper
  • 1 lemon
  • 1/2 onion

Start by mixing the garlic with the butter, mash it up with a fork if you need to. Rinse the chicken under cold water and pat try. Gently peel back the skin of the chicken with your fingers (wash your hands first!). Take pieced of garlic butter and spread around under the skin, even for the drumsticks. Once it’s evenly spread around, lightly spray with oil on the outside. Salt and pepper well. Stuff the inside of the chicken with a cut lemon and onion.

Roast in the oven at 450 degrees for 30-40 minutes, or until the temperature of the thigh meat reaches 155 degrees. Let sit for 10 minutes before carving. Enjoy!

Servings: 4 entree servings


Roasted, Stuffed and Baked Poblano Peppers November 14, 2009

Filed under: Misc. — cookinghussy @ 5:00 pm

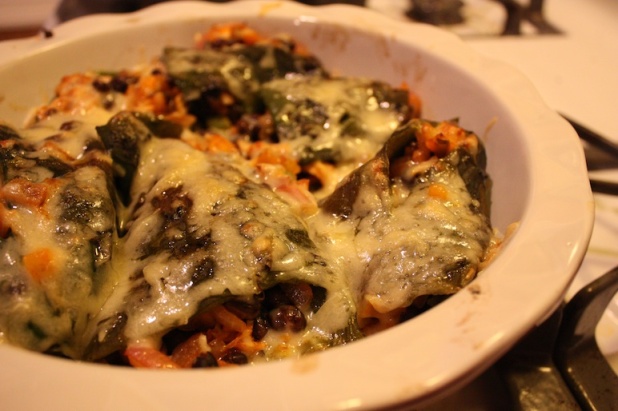
Baked Poblanos 1

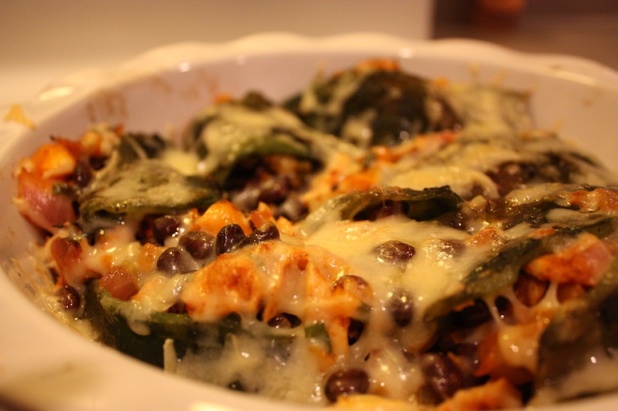
I made these roasted, stuff poblanos several weeks ago. I *thought* I saved a link to the base recipe I used as a starter, but I failed! I can tell you what I remember though and post some links of some similar recipes to go from.

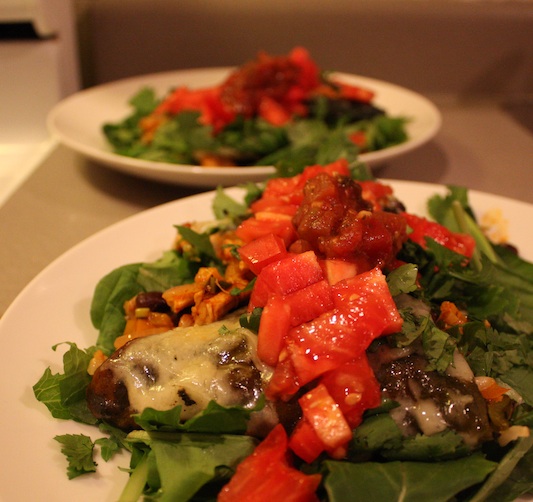
Baked Poblanos 2

Start by roasting 5-6 poblano peppers. I do this on the gas burners, roasting each until the skin is black. Then toss them all in a bowl and cover with plastic wrap to basically steam the skins off. Gently peel the charred skin off and cut out the center and seeds. Set these aside. Then make the stuffing. I know sauted a can of black beans, onions, garlic, some leftover shredded chicken and spices (cayenne and cumin for sure). Stuff each pepper with the sauted mixture and cover with some shredded cheese. Bake for 20 minutes or so in a dish. I served mine on a bed of spinach topped with fresh salsa, cilantro and tomatoes. This recipe looks pretty good too!

Baked Poblanos 3


Ginger and Green Soup October 21, 2009

Filed under: Soup/Stew — cookinghussy @ 9:07 pm

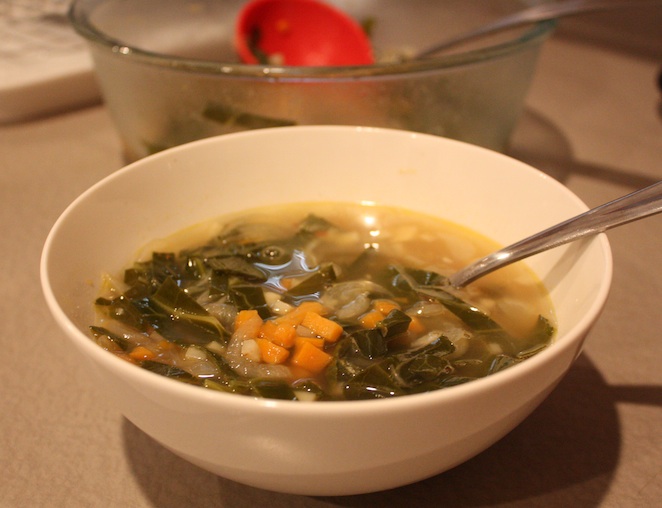
Ginger & Greens Soup

Fall soup time! Fall soup time! I got some mustard greens in my produce box just in time for this soup from 101cookbooks. I switched some things up as I didn’t have any actual ginger on hand (oops) and I used the heartier mustard green instead of spinach, but I think I got the idea. This is a nice brothy soup too.

  • 1 large yellow onion – diced
  • 2 T olive oil
  • 1 1/2 t. sea salt, plus more to taste
  • 1 large sweet potato – diced
  • 1 large leek, white and light green parts
  • 1 bunch spinach or mustard greens
  • 3 T chopped fresh ginger, plus more to taste (or, when you find out you don’t have ginger, used dried ginger!)
  • 2 C good-tasting vegetable broth
  • 2-4 teaspoons fresh lemon juice
  • freshly ground black pepper

Chop the onion and cook it slowly in the olive oil with a sprinkle of salt, stirring now and then, over low heat until it is soft and golden, about half an hour.

Meanwhile, peel and dice the sweet potato and put it in a large soup pot with 2 cups water and a teaspoon of sea salt. Thoroughly wash the leek, spinach, or mustard greens, chop them coarsely, and add them to the pot, along with the chopped ginger.

Bring the water to a boil, then lower the heat and simmer the soup, covered, for 30 minutes, or until the vegetables are completely tender. Add the caramelized onions when they are ready. When the vegetables are soft, add the vegetable broth (you can add less if you like a thicker soup) and decide whether you want your soup chunky, like this, or smooth. If the latter, puree the soup in a blender, in batches, or with an immersion blender until it is smooth.

Stir in 2 teaspoons of the lemon juice and a few grinds of black pepper. Taste, and correct the seasoning with additional salt or lemon juice.